It's essential to use some royalty free images for a website. It's really part of your blogging work. So if you've been neglecting that area, you should at least know why it's important to embed at least one image in your webpage and the benefits from it.
Reasons Why You Need Images In Your Blog Post
There are mainly 3 reasons why you should include images;
#1 Readability
When you visit a webpage and find no occasional photos but just text throughout the page...don't you feel a little discouraged from reading on, regardless to the content? Just like any other landing pages or advertisements, visual speaks louder and quicker than text to your brain. Images in the post will welcome readers to the actual content.
#2 Better SEO
Each time you add an image to your blog post, you should always add Alt text (often called "Alt tag" but it's apparently incorrect - see this article by Moz). Alt text is part of SEO essentials, helps you to rank better both in web search and image search results.
#3 Better Social Share
When your post is shared in social media, it gets more views when posted with an image than without. Especially with Twitter where the number or character is restricted up to 280 per post. Posts without an image can be so easily missed by your followers.
So where can you find good images?
Licensed Stock Images
Stock photo agency sites will give multiple licensing options. Licensed images are great because;
- Easier to search - Many licensed photo agencies have images in better organized manner. Categorized by photos, vector graphics, illustrations, video clips, etc.
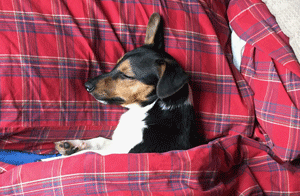
- Variety - Shutterstock for example, have over 260 million images to offer. If you search for "Jack Russell Terrier", you'll find hundreds of images. Whereas on free stock image sites you can only find a few.
- Uniqueness - It means you can refine your search to find more specific photos, for example "Jack Russell Terrier sleeping" - you'll still find a few in licensed photo sites, but very unlikely in royalty free image sites. You can pick images that are not available elsewhere.
- Quality - Photo qualities are without a doubt, all good. Whereas some free image sites include all kinds of amateur photos. Good opportunity for anyone who wants to contribute but the users need to skim through a lot to find decent photos.
Having said all that, the prices can be extortionate and not easily affordable by everyday bloggers. Some images are only licensed for a period of time - not suitable for blog posts if they have to be taken down before the expiry, or the license needs renewing every now and again.
Royalty Free Images
There are many sites that stock royalty free images ("20 Sites With Dazzling Free Photo Stock Images"). You can freely resize and modify, and each image has a license information (such as "free for commercial use, no attribution required"), if you want to make sure before you use.
You can also find royalty free images from Google image search. You search for images by name first, then go to "Tools" menu underneath, and choose "Labeled for reuse with modification".
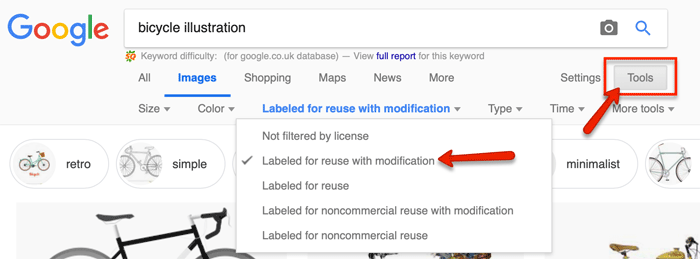
If you are looking for illustrated image, you can search by a phrase "bicycle illustration" or "bicycle cartoon" instead of just "bicycle".
You can often find an image with transparent background by searching "png" in the end, e.g. "bicycle png".
Resizing Images
These stock images are huge, can be up to 4,000 x 3,000 pixels. So you need to use a photo editor to (1) reduce the dimension then (2) save it with an SEO friendly name.
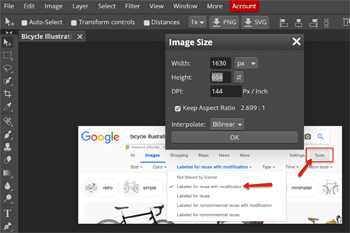
I use Adobe Photoshop Elements myself because that's what I'm used to, but it's not free. There are many free online photo editor software. Photopea is a good one.
- Go to "Image" in the top menu > Image size, then
- Go to "File" in the top menu > "Export As" > choose jpg or png.
Modify / Add Text To A Free Image
If you want to make a change to a chosen image such as to change the tone of color, add text or symbols, you can do that using Canva before resizing it.
Canva is a graphic design tool. It stocks some free images but not many. Today I'm going to download a free image from elsewhere, import it to Canva and add a text.
If you've never used it before - Canva is a great easy-to-use tool. You first need to sign up but as a free user there's a lot you can do. It offers a variety of templates. For social media posts, Facebook/Twitter cover templates, posters, flyers, magazine covers, birthday and holiday cards.
You can pick a template and customize it, but today I'll open a blank canvas and add an image and text to it.
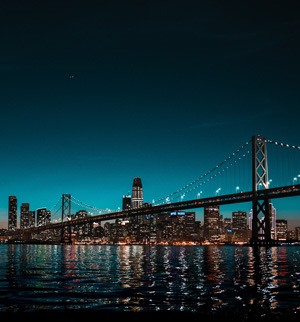
So I just downloaded this beautiful photo of San Francisco taken by Casey Horner
(@mischievous_penguins) from Unsplash.com.
It's a free download, and you don't have to credit the photographer's name, but it will be "appreciated and allows photographers to gain exposure. Embed a credit badge." That's exactly what I've done (the badge below the photo), and in fact that's what I should be doing every time from now on!
The original dimension is over 4,300 pixel and the file size is 3.9Mb. I want to use it for my webpage and it's definitely too big. Also this photo happens to be square but I might want to fit it in a rectangular title image space.
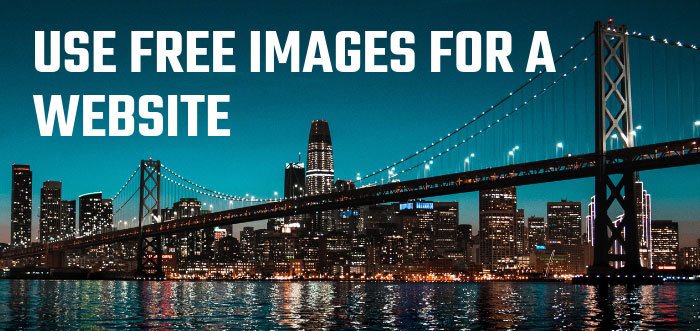
I go to Canva, and firstly create a blank canvas with custom dimensions. I set it to 700px (w) x 400px (h).

Now I go to "Uploads" in the left side menu bar and upload the photo I've downloaded (or drag & drop). The photo will appear in the side panel, click it and it should appear in the middle of the canvas (left side of the screenshot below).
Click and hold the corner of the San Francisco image and stretch it. It should fit in the rectangular canvas.

Click "Text" from the text menu, and add text, change the font style and color, position it, and it's done. I download it (from the top-right hand corner of Canva menu) to my hard drive.
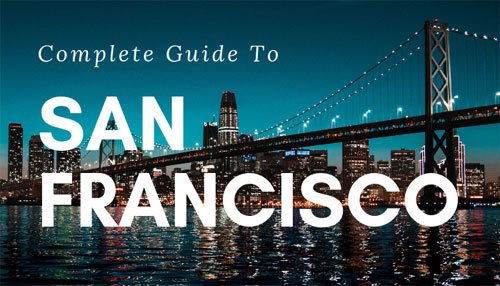
You may notice other options such as shapes, lines, illustrations, frames, etc under "Elements" menu on the left, that you can add to your image. Or just use a search bar - type in "arrow" for example, a variety of arrow shapes will come up in the panel.
But that's not the end, unfortunately. The downloaded png image is over 520Kb, and it's still too big. Now I need to "compress" the image for website use.
Image Compression
I actually use Photoshop, but there are some good image compression tools. TinyPNG is a good one, but kraken.io is what's recommended by Thrive Themes, and it does a great job.
You need to sign up with kraken.io first, but it usually compresses images by over 70%.
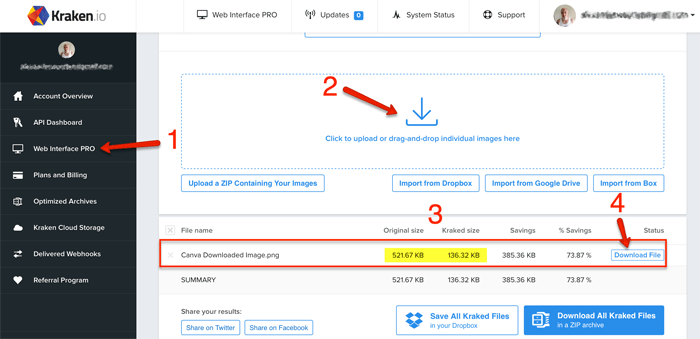
- Go to Web Interface PRO (you don't have to be a Pro/paid member).
- Drag and drop the image (or multiple images) in the space. The compression will automatically start.
- The original size was 521Kb, compressed by 73.87% to 136Kb.
- Click to download the image, and now it's ready to use for a webpage.
That's it!
Oh one more thing!
Try Pablo
Pablo by Buffer allows you to create an image with inline text very easily. Search for images by keyword, and it will automatically pick a great selection of royalty free images for you. You can add text, change font style or size, reposition the image should you need to.
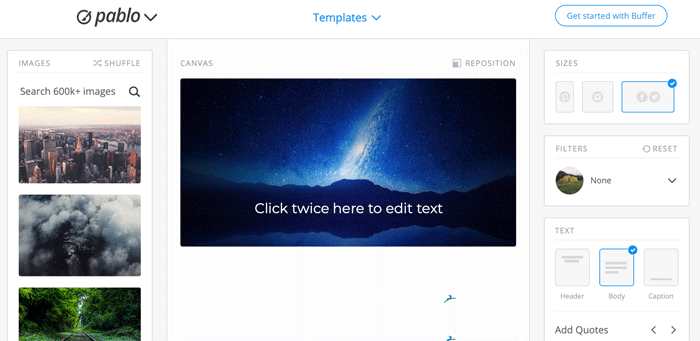
Pablo is created by Buffer, and Buffer is a social media automation tool, so the finished image will be available in landscape (for Facebook and Twitter), square (for Instagram) and portrait (for Pinterest).
Pablo makes it so easy & quick to download the image with text and use it for your website. But the finished image is huge in size so you need to resize it and compress it using above steps before uploading it to your site.
Use Free Images For A Website Right Way
These tool will be used often when creating blog posts. It'll be handy if you create a new folder in your browser tool bar, name it "Image Tools" for instance, and save all these necessary web tools in order. For example, (1) royalty free image stock, (2) design tool, (3) resizing tool, (4) compression tool.
It may seem like a LONG process to download an image, add text and optimize it to make usable for your web posts, but the process will soon become second nature to you.

