Bing is a search engine owned and operated by Microsoft, and the second largest search engine behind Google in the US with a query volume of 21%. That's more than one fifths. Even if you don't normally "Bing it" and you always "Google it", in terms of making your own website known, Bing really holds 1/5 of the power. You can't afford to ignore Bing Webmaster, right?
I've explained about how you submit your Sitemap and article posts to Google Webmasters (Google Webmasters And WordPress Quick Guide). It's the same principle with Bing Webmaster. Search engines will crawl your published pages in time, but by submitting the info, it will make the process quicker.
Bing Webmaster - Signing Up
Signing up with Bing Webmaster is free of course, and to set up and verify your website(s) for the first time is pretty easy too.
Sign in or sign up for the first time - if you already have an account with Microsoft such as Hotmail, Skype or MS Office, you can sign straight in. Otherwise create a new account with any email address that you have. Fill in your detail and save. You will receive a confirmation email in seconds. Click to confirm.
Add Your Website and Verify Ownership
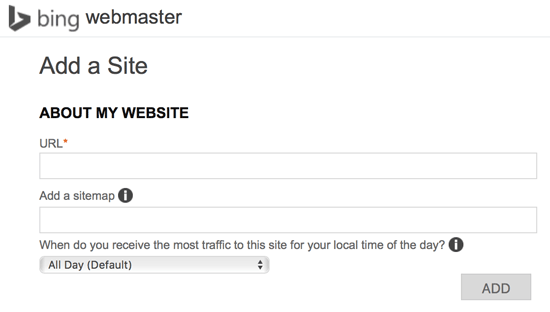
Firstly add your website URL, then add the sitemap. How you find your sitemap created on WordPress by All In One SEO or Yoast is explained here. This can be added later.
"When do you receive the most traffic to this site for your local time of the day?" You can leave it All Day as default and change it later.
To verify the ownership of your website, three alternative ways are suggested The first option is to download the file listed as shown in image below, and upload it to your directory using FTP, that is not difficult if you know how to use an "FTP application". But let's skip this one (if you would like to try this option but don't know how, don't hesitate to get in touch with me!)

The second option is the easiest for WordPress user.
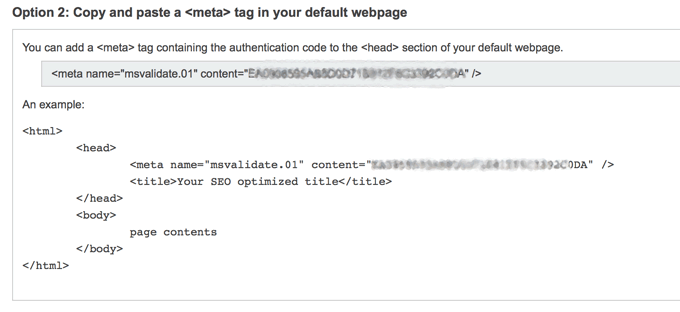
All you have to do is to;
- Copy the code in the grey box ( <meta name = .......... />)
- Go to WordPress wp-admin and from the left-hand menu, go to Appearance > Edit.
- Now from the list at right-hand side, click "Theme Header (header.php)"
- Find where it says </head> and paste the code in the line just above.
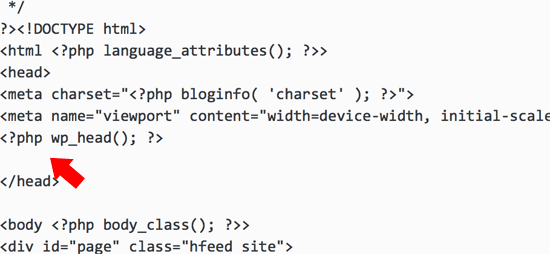
- Scroll down, click "Update File".
- Go back to Bing Webmaster, click "Verify" button at the bottom-left.
Now your website ownership should be verified. The third option is for Bing to access to your domain hosting account. Copy the verification code shown in Bing, go to your domain hosting company's page and open your dashboard. Paste the Bing code onto your advance DNS settings, the box where "CNAME record" should be inserted. But for WordPress bloggers it's most likely the second option that's straight-forward.

Bing Webmaster Search Engine Submission
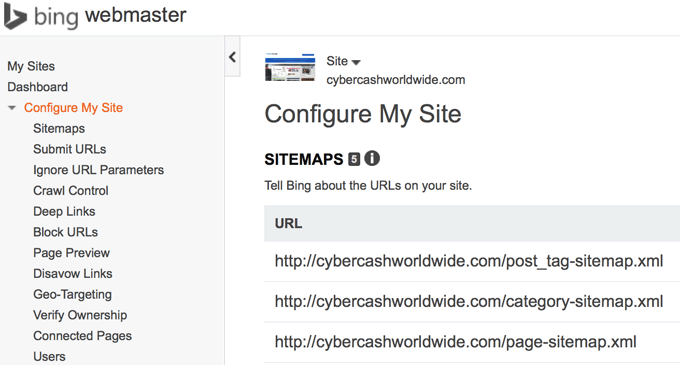
Among many functions and analysis tools within Bing Webmaster, what you need to submit is your sitemap files (only once in the beginning) and your web post (each time it's been published).
Click Dashboard > Configure My Site in the left side menu.
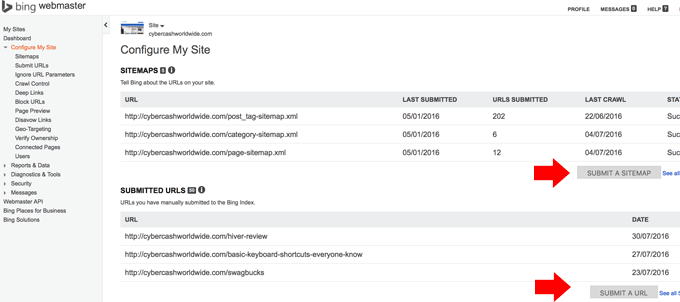
Submit Sitemap(s) - you may have one sitemap (.xml) file for the entire website, or you may have a few. Copy the sitemap URL, click the box as shown in the image above, and paste it. You only need to do it once in the beginning. And thereafter only required if you've made a major change in site structure.
Submit URLs - every time you've published a web post, submit the URL to Google Webmasters, as well as coming back here to also submit it to Bing. All you do is to copy the URL, click the box, paste it and click submit.
That's it. It's very straight-forward. Just like Google Webmasters, it may sound cumbersome to submit each and every published post to Bing Webmaster. But bookmark the page, and after a few times the submission ritual will become a second nature to you.


