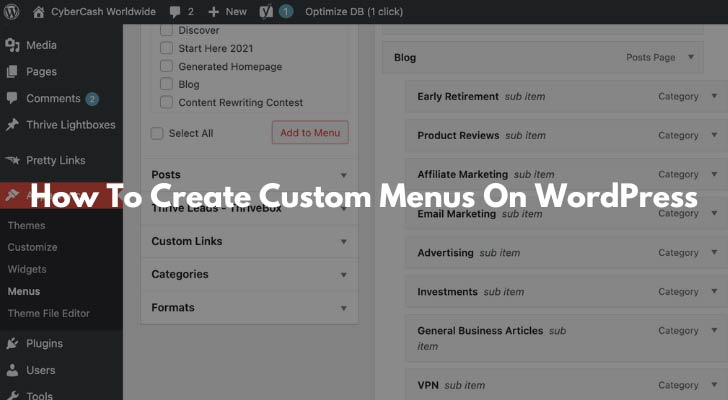
WordPress is indeed known for its ease of building websites. Perhaps the trickiest, most daunting part in the beginning is structuring the menus. But navigation menus are there to help visitors find content easily and understand the layout of your site. They play a crucial role in website usability, organization, mobile responsiveness, and SEO, contributing to the overall success of your site. So let's get started!

How Many Menus Do You Need?
You only need two menus; the primary menu and the footer menu on your site. There are other types that you can add, but too many menus will confuse your visitors.
Primary Menu
This is the main navigation menu typically located at the top of your website. It often includes essential links to important pages such as Home, About, Services, Blog, Pricing, and Contact.
You can create a nested menu here (sub-menu under the main menu) - For example, if your site offers 3 different types of services, 3 x sub-menu items (Service A, Service B, Service C) can be placed under "Services."
Footer Menu
This menu appears in the footer area of your website and provides additional navigation options. It may include links to pages like Terms of Service, Privacy Policy, Copyright, etc.
Other relevant items can go under the footer menu, for example, if you have an e-commerce site, you might include links to customer support, shipping information, or returns and exchanges policies in the footer menu. About and Contact can also be included in the Footer menu. If you have a blog, you could include links to popular categories or featured articles.
Other menu types include;
- Header Menu: Some WordPress themes offer a separate header menu that appears above or below the primary menu. Unless you really think you need an extra menu for secondary navigation, it can only make your site look more cluttered.
- Sidebar Menu: If your theme has a sidebar area, you can create a menu specifically for that section. Sidebar menus are commonly used for secondary navigation, category links, or related content. But they have become less useful with the rise of mobile usage.
Map Out The Menu Structure
Mapping out your WordPress menu structure can help you visualize and plan the organization of your website's navigation. Writing it down is a good approach, as it allows you to brainstorm and make adjustments before implementing it in WordPress. Here's a step-by-step guide to help you map your WordPress menu structure:
- Step 1: Start by identifying the main sections or categories of your website. These could be broad topics or key pages that you want to include in your menu.
- Step 2: Write down the main sections and consider the order in which you want them to appear in your menu. This will form the primary level of your menu structure.
- Step 3: Under each main section, list the sub-pages or subcategories that belong to that section. These will become the dropdown or nested items in your menu.
- Step 4: Continue this process for each main section, adding sub-pages or subcategories as needed. You can have multiple levels of sub-pages to create a hierarchical menu structure.
- Step 5: Consider the logical flow and organization of your content. Ensure that related pages are grouped together under appropriate main sections or subcategories.
- Step 6: Think about the user experience and ease of navigation. Keep your menu structure simple and intuitive, avoiding excessive levels of nesting or too many items in the menu.
- Step 7: Consider including a "Home" link as the first item in your menu, which will take users back to the homepage.
Once you have your menu structure mapped out, you can start implementing it in WordPress;

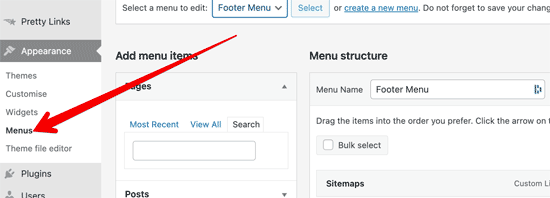
- Go to your WordPress dashboard, navigate to Appearance -> Menus, and create a new menu.
- Add your main sections as menu items. You can add custom links, pages, categories, or any other type of content that you want to include in your menu.
- For sub-pages or subcategories, indent them under the appropriate main section to create a nested or dropdown menu.
- Adjust the order of menu items by dragging and dropping them into the desired position.
- Save your menu and assign it to a menu location (e.g., primary menu, footer menu) based on your theme options.
Don't Overcomplicate Your Menu
Overcomplicating the menu structure refers to creating a navigation menu that is overly complex, confusing, or difficult to navigate. When the menu structure becomes convoluted, it can negatively impact the user experience and make it harder for visitors to find the desired content on your website. Here are a few examples of overcomplicated menu structures:
#1 Excessive nesting:
Nesting refers to placing sub-pages or subcategories within main menu items and creating dropdown menus. While dropdown menus can be useful for organizing content, excessive levels of nesting can make the menu structure overwhelming. For instance, having multiple levels of sub-pages within sub-pages can result in a menu that is visually cluttered and challenging to navigate.
Example:
- Main Category 1
- Sub-category 1.1
- Sub-sub-category 1.1.1
- Sub-sub-sub-category 1.1.1.1
- Sub-sub-category 1.1.2
- Sub-category 1.2
- Main Category 2
- Sub-category 2.1
- Sub-category 2.2
#2 Too many menu items:
Having an excessive number of items in your menu can overwhelm visitors and make it harder for them to find what they are looking for. It's important to prioritize the most important and frequently accessed pages in your menu. If you have a large number of pages, consider using subcategories or dropdown menus to organize related content.
Example:
- Home
- About Us
- Services
- Our Team
- Portfolio
- Blog
- Testimonials
- Products
- Events
- Contact Us
- Privacy Policy
- Terms of Service
- FAQs
- Careers
- Resources
- Support
- Client Area
#3 Inconsistent organization:
A lack of consistency in organizing menu items can confuse users and make it challenging to find specific content. Users expect a logical and consistent menu structure. If your menu items are randomly arranged without a clear pattern, it can be frustrating for visitors trying to navigate your website.
Example:
- About Us
- Products
- Blog
- Contact
- Services
- Home
- Resources
- Portfolio
- Careers
- Events
To avoid overcomplicating the menu structure, consider these best practices:
- Keep the menu structure simple and intuitive.
- Limit the number of menu items to the most important and relevant pages.
- Use clear and descriptive labels for menu items.
- Group related content together in subcategories or dropdown menus.
- Ensure a consistent and logical organization throughout the menu.
- Test the menu structure with real users to gather feedback and make improvements.
By following these guidelines, you can create a menu structure that is user-friendly, easy to navigate and enhances the overall user experience on your WordPress website.
Should I add a Link to My Affiliate Disclosure in The Menu?

Yes, it is recommended to add a link to your affiliate disclosure in your menu for transparency and accessibility. Including a link to your affiliate disclosure page in the menu ensures that visitors can easily find and access the disclosure information.
The Federal Trade Commission (FTC) requires affiliate marketers to disclose their affiliate relationships and any potential earnings from those relationships. However, the placement of the disclosure is not specifically dictated by the FTC. Instead, the key requirement is that the disclosure should be clear, conspicuous, and easily noticeable by users.
Add the link to your footer menu. Legal pages such as affiliate disclosure, privacy policy, terms of service, etc., are not something that users are looking for, so you never had to add them to your top (main) menu. So long as you display a link on your homepage. That's good to go.
To add a link to your affiliate disclosure in your menu, follow these general steps:
- Create your affiliate disclosure page: Create a dedicated page on your WordPress site that includes your affiliate disclosure statement and any other relevant information regarding your affiliate relationships.
- Customize your menu: Go to the "Appearance" section in your WordPress dashboard and navigate to "Menus." Select the footer menu.
- Add the affiliate disclosure link to the menu: Within the menu editor, locate the section where you can add custom links. Enter the URL of your affiliate disclosure page and provide a label or title for the menu item (e.g., "Affiliate Disclosure" or "Disclosure Statement").
- Save the menu: Once you have added the affiliate disclosure link to your menu, save the changes to update the menu structure on your website.
Is It OK To Change The Menu Structure?
Yes, it is perfectly okay to change your menu in WordPress. In fact, updating and modifying your menu is a common practice as websites evolve and content needs change over time. Here are a few scenarios where changing your menu may be necessary:
- Website Restructuring: If you have reorganized your website's content or added new sections, it's important to reflect those changes in your menu. Adjusting the menu structure ensures that visitors can easily navigate to the desired pages and find the relevant content.
- Adding or Removing Pages: When you create new pages or remove existing ones, it's essential to update your menu accordingly. Adding new pages to the menu makes them easily accessible to visitors while removing obsolete pages helps declutter the navigation and improve user experience.
- Highlighting Priority Pages: As your website evolves, you may have specific pages or sections that you want to emphasize or promote. Modifying your menu allows you to give prominence to these priority pages and make them more visible to visitors.
- Improving User Experience: The menu is a crucial navigation tool for users. If you receive feedback or notice usability issues with your existing menu structure, it may be necessary to make changes to enhance the user experience. This can involve simplifying the menu, adding dropdowns for subcategories, or improving the labeling of menu items.
- Aesthetic or Design Updates: When you undergo a website redesign or make changes to the overall design aesthetic, it may be necessary to update your menu to ensure it aligns with the new visual style and layout.
When making changes to your menu, it's important to consider usability, SEO implications, and the overall impact on user experience. Ensure that the menu remains intuitive, organized, and easy to navigate.
Additionally, when you modify your menu, remember to update internal links within your website, optimize anchor text, and consider the responsiveness of the menu for mobile devices.
By keeping your menu up to date and aligned with your website's content and goals, you can provide an improved user experience, make it easier for visitors to find what they're looking for, and maintain a well-structured and organized website.
Update Your XML Sitemap

Every time you make significant changes to your menu structure, resubmit your XML sitemap to search engines. This helps them discover the updated structure and improves the indexing of your website's pages.
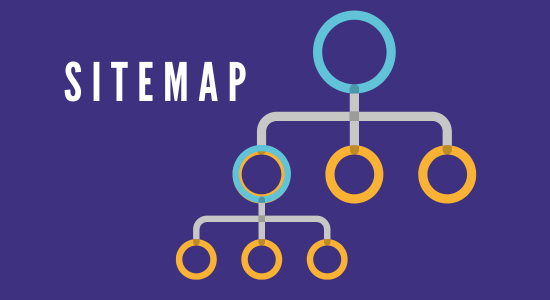
You may already know that an XML sitemap is a file that lists all the important pages of your website, helping search engines understand its structure and content. It's an essential tool for search engine crawlers to discover and index your web pages.
To update your sitemap, follow these steps:
- Generate an updated sitemap: There are several plugins available for WordPress that can help you generate an XML sitemap automatically. Popular options include Yoast SEO, All in One SEO Pack, and Google XML Sitemaps. These plugins typically provide options to configure your sitemap settings and generate an updated sitemap file.
- Submit the updated sitemap to search engines: Once you have generated the updated XML sitemap, you need to notify search engines about the changes. Both Google Search Console and Bing Webmaster Tools allow you to submit and manage your website's sitemap. Access the respective webmaster tools, navigate to the sitemaps section, and submit the URL of your updated XML sitemap.
By submitting the updated sitemap to search engines, you are signaling to them that changes have been made to your website's structure. This helps search engines discover and index your web pages more efficiently, ensuring that the changes you made to your menu structure are reflected in search engine results.
Note that search engines will still crawl your website naturally over time, even without submitting an updated sitemap. However, submitting the sitemap expedites the process and ensures that search engines are aware of the changes sooner.
Regularly update your sitemap whenever significant changes are made to your website's structure, including menu updates, to maintain an accurate representation of your website's content for search engines.
How To Create Custom Menus On WordPress: Final Words
Custom menus in WordPress are an essential tool for website owners who want to improve user experience and navigation. With custom menus, you can create a unique structure that reflects your brand's identity and showcases the most important pages on your site.
Creating and managing custom menus is easy with WordPress, so you will soon be able to have full control over your website's navigation bar.
Remember that creating great content is just one part of running a successful website; optimizing it for search engines is equally crucial. Custom menus help both users and search engines navigate through your site better, leading to higher engagement rates, hence increased traffic.

Very useful post. For WordPress newbies this is essential. Thanks!