If you're looking for a free online screen recorder with a facecam that doesn't require the slightest technical skills, welcome to my RecordCast review. Well, just give it a try - you'll be able to start recording your screen the moment you visit the site. But you might as well sign up with it because it's 100% free and it will only allow you to download what you've just recorded and edit it if you're logged in.
I've never been good at speaking to a camera and my video recording/editing skills are forever at a beginner level, yet I find RecordCast extremely easy to use. Some of you will perhaps find it too simple and inflexible, I don't know. See if this is something you can make use of.
RecordCast Review | ||
Product Name: | RecordCast | |
Website URL: | recordcast.com | |
Type: | Online Screen Recorder | |
Owner: | PearlMountain | |
Price: | Free | |
Rating: | ||
What Is RecordCast?
RecordCast is an all cloud-based screen recorder for desktop, so you don't need to install anything on your hard-drive. It allows you to take 3 steps to create your own video clip - select/adjust the settings, record, and edit, for free. Your free video will not be watermarked, so it'll be perfectly usable for social sharing purposes.
To download and edit, you need to be logged in to your RecordCast account. RecordCast is owned by PearlMountain, who also owns FlexClip, so if you already have a FlexClip account, you can log on to RecordCast using the same ID and password.
The video editor is very simple, equipped with the minimum features -add text overlay and audio, and zoom in and out as well as split and rearrange clips. For a beginner, it's not overwhelming and manageable, I think it's perfect. However if you want to make more detailed adjustments, you can simply use FlexClip which you'll also have access to. Such as to change brightness/tint, or add extra animated elements.
RecordCast works on PC or Mac. You'll have to have a Chrome browser. Not accessible on a mobile device.

The 3 Steps
Here are the easy 3 steps to screen record a video using RecordCast.
1. Choose a Recording Option
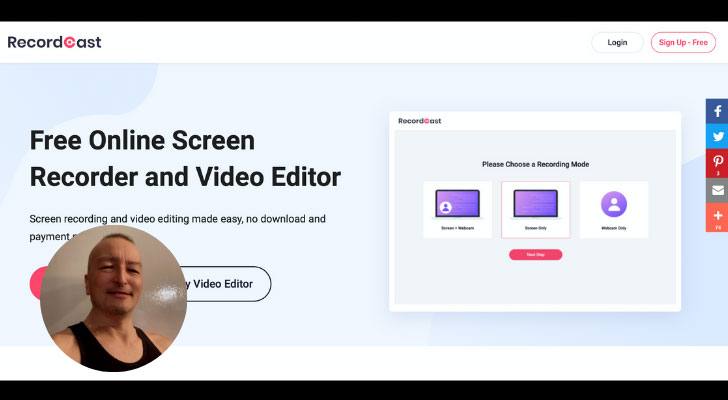
Firstly, choose a recording mode from;
- Screen + Webcam (Facecam) - screen recording with your face talking to the webcam in the corner, you know what I mean.
- The Screen only, or
- Webcam only - you can also use RecordCast as a webcam recorder.
Next, choose an audio mode;
- Microphone + system audio,
- Microphone only,
- System audio only, or
- No audio.
2. Start Recording
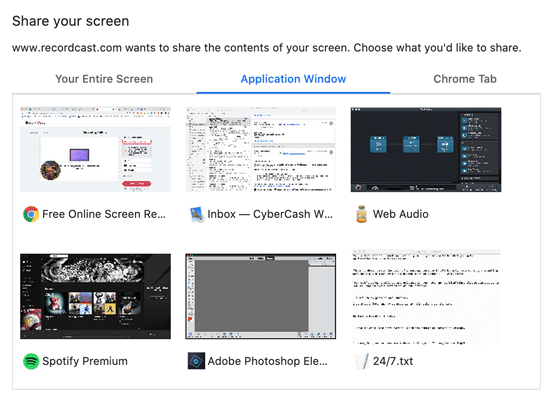
Click you click the "Start Recording" button - if you've chosen the webcam-only, it will start immediately. If you've chosen to record screen or screen + facecam, select what you want to record from the list.
- Your Entire Screen - What you actually see right now will be what you get.
- Application Window - All the applications/software that are currently open on your PC/Mac will be listed in the box These include your mail application, text/PDF files, and other web browsers. Select one that you're going to record.
- Chrome Tab - All the tabs of your Chrome that are currently open will be listed. Select one that you're going to record.

As soon as you select your screen option, you'll be directed to the chosen application or Chrome tab and it will start recording. A "stop" button will appear at the top of the screen to click when finished.
3. Download or Edit
When you've finished recording, you can either download it right away or edit it before downloading. One thing I find odd is that if you choose to download the video at this point, it will automatically be downloaded in WebM format - no other file format options. But if you edit it first, it will allow you to download it in mp4 - no other options, either. But I guess most of us are happy with one of these two file formats - I can't seem to find the market share statistics but mp4 is one of the most popular ones for sure.
If you want to convert the video format from WebM to mp4 or vice versa, FlexClip's video converter will also let you do it for free.
Screen + Webcam Option
The facecam feature is great for creating a tutorial video, but the only drawback in my opinion is that you cannot preview yourself talking as you record the screen simultaneously. It's not the end of the world though, it just means that although it will let you download it as soon as you finish recording, you're most likely to want to use the video editor to reposition yourself.
Your webcam will only be recorded in full-scale but automatically cropped around the center. At the video-editing stage, you can reposition your face in the center of the circle. The circle can be changed to any size by dragging. In fact, it can be changed to square, and it can also be full-screen - you can cut out some of the scenes of yourself speaking and switch them to full-screen. So you do have an option to give a little tweak.
The Video Editor

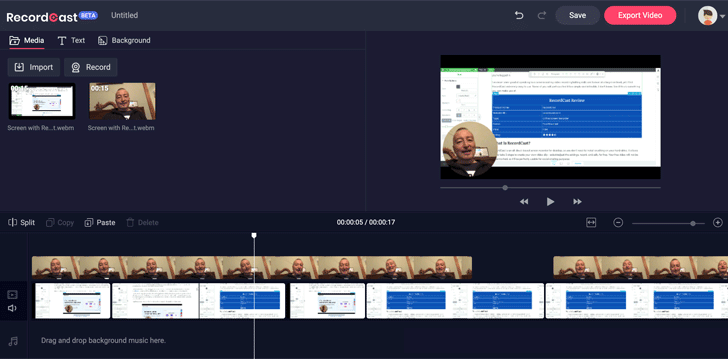
RecordCast's video editor edits any videos, not restricted to screen recordings. You can have two layers of videos. The main video goes on the bottom layer and the extra video overlays, so it will be fully resizable. When recording, if you choose the "Screen + Webcam" option, the screen recording will be the bottom layer and your facecam will automatically be positioned at the bottom-left corner in a circle. As I mentioned earlier, this will be resized and repositioned in any way you like.
You can use any two pre-recorded videos, which means you can use the top layer video for a different purpose, it won't have to be a webcam. For example;
- A popup insertion - showing a totally different scene in a small window.
- A behind-the-scenes video. Or using two cameras, showing the same scene from two different angles, etc.
The good thing is, if you feel you need to add a screen recording clip while editing the video, you can spontaneously record it without leaving your RecordCast's dashboard and do so. The newly recorded clip will automatically be added to the editor, ready to be inserted anywhere in your existing video.

Drag and drop a video to start editing. You can add some additional scenes by recording screen and/or webcam.
Video Editing Steps
Personally, I find the format of the RecordCast's video editor very similar to iMovie, so it was easy to get on from the start. The steps would be;
- Drag & drop your video from the hard drive to your RecordCast video editor dashboard. You can add more than one video and join them into one.
- Trim the video - split and delete unwanted scenes.
- Add extra scenes if needed (either screen recordings or webcam).
- Zoom in/out and crop any particular scenes or the entire video.
- Add text (overlay or as an interlude caption between two scenes).
- Duplicate a scene to repeat, drag scenes back and forth to change the order.
- Add audio - music or record your own voice. The sounds already on your original video can be adjusted or muted.
When finished, click Export to download it in mp4 file.
Record Screen, Then Add Facecam (Optionally)
Sometimes you might find it easier to record the screen first, then record yourself speaking to the webcam as you watch the replay of the screen video. You might want to pause the screen video at times to talk more, showing yourself full-screen. Or you might want to insert a text instruction, in which case you can insert a plain background (a variety of colors are available) and type it in. Recording the screen and the webcam separately means it will obviously take twice the time, but you might find this method more organized, and you can do it easily with RecordCast.
RecordCast Pros and Cons
Pros
Cons
RecordCast Review - Conclusion:
In my eyes, RecordCast is the best screen recorder & editor that I've seen, in terms of handiness and usability. There may be better tools out there that allow you to enhance your videos in all sorts of different ways, but if you're a beginner like me, RecordCast does a perfect job. And it's free.
If you're looking to create a video tutorial, a digital product review, or just to remix a few video clips, I suggest that you definitely try RecordCast. If you do try, let us know what you think of it by leaving a comment below. Good luck!

I really love ur website. how long has it b established
+ how did u start it first? Is there some things u make use of this? what if u don’t have to record screen?
Hi Vyktor, I don’t know what you mean. Are you looking to build a business website?
hi really you are right i used record cast & think it so easy to use. i thank for free resource.
Hi Rakesh, great to hear that you enjoy RecordCast. Thanks for your comment!
Hi Ray, thank you for your recordcast review. I thought it was very interesting. I have never made a tutorial video and I didn’t even know how I could do it. I was always wondering. I know now how the webcam in the circle works, this is great. I am a Mac user but I have never used iMovie, does it mean if I master Recordcast will I find it easy to use iMovie as well?
Also you say Recordcast only works on Google Chrome but I use a lot of Safari…does it mean if I want to make a screen recording of say, WordPress instruction, do I have to have WordPress on Chrome as well?
Thank you for your support and amazing review, Ray.
Hi Hitesh, thanks for sharing your thoughts. To answer your questions… I have seen a few video editing software with the same format, so yes, if you’re used to RecordCast you’ll find it easy to get on with iMovie, and vice versa. It’s only the RecordCast app that works on Chrome, but it can record other browsers. So you can have your WordPress admin running on Safari, RecordCast on Chrome, and record your WP admin screen perfectly. I hope you’ll enjoy it, thank you for your comment. I wish you all the best!